

Table of Contents
- Why Live-Edge Slabs Crack During Drying
- The Prevention Timeline: From Fresh Slab to Finished Table
- Proper Live Edge Slab Drying Techniques
- Sealing Slab Ends to Slow Moisture Loss
- Managing Live Edge Table Humidity in Your Home
- Best Finish for Live Edge Tables to Resist Cracking
- Live Edge Slab Cracks Repair and Stabilization
- Building Your Table to Allow Natural Wood Movement
- Frequently Asked Questions
Last Updated: October 10, 2026
Why Live-Edge Slabs Crack During Drying
Live-edge wood slabs crack because wood loses moisture unevenly. The outer surface dries faster than the interior.
Understanding this process is the first step to prevent live edge table cracking. The wood doesn't fail because it's weak.
Different wood species respond differently. Thicker slabs take longer to dry and face more stress. Wider slabs with dramatic grain patterns tend to check more visibly.
The Prevention Timeline: From Fresh Slab to Finished Table
Preventing cracks requires a systematic approach from the moment a slab is cut. Think of it as a timeline with three critical stages. Each stage builds on the previous one. Skip any stage, and cracks become far more likely.
Stage 1: Immediate Post-Cut Sealing
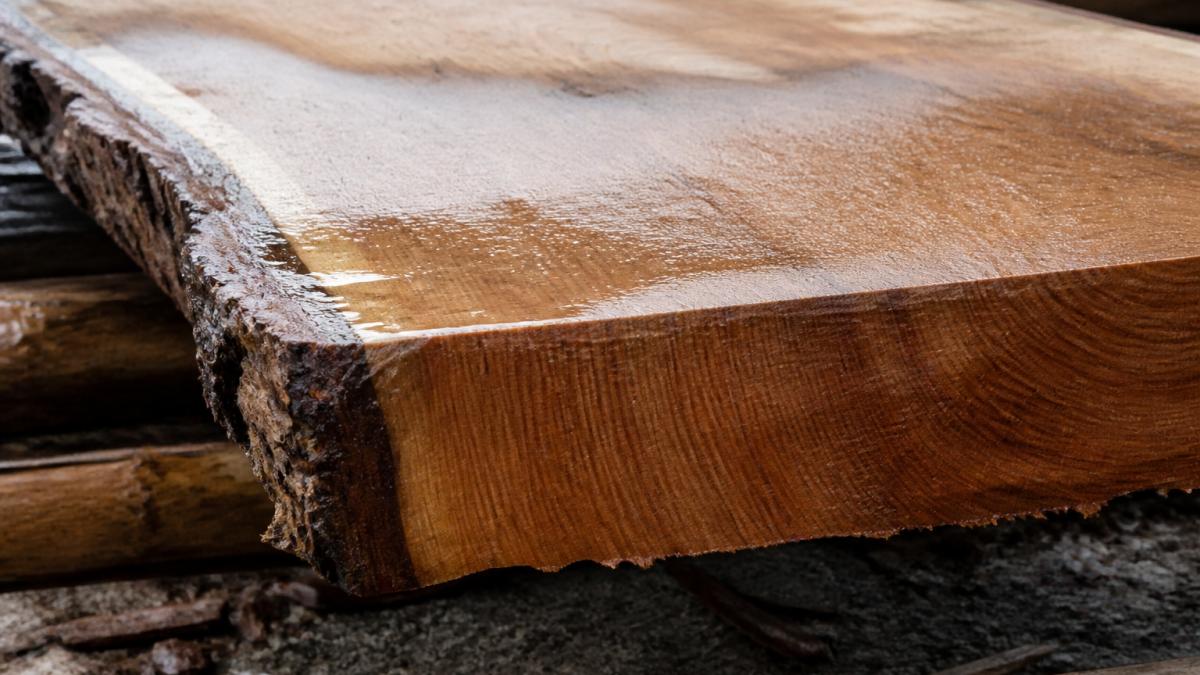
Seal the ends of a freshly cut slab within hours of cutting. The end grain dries much faster than the flat surfaces. Sealing slows this rapid moisture loss and reduces the stress that causes checking.
Common sealants include:
- Wax or paraffin applied hot
- Specialized slab-end sealers
- Thick paint or polyurethane
- Tyvek tape for temporary protection
Apply sealant generously to both ends. The goal is to create a barrier that slows, not stops, moisture movement. You want the slab to dry, just evenly.
Stage 2: Kiln Drying and Moisture Control
Kiln drying is the most controlled way to remove moisture from thick slabs. A kiln slowly reduces temperature and humidity in a sealed chamber.
Measuring moisture content is essential. A moisture meter tells you exactly how wet the wood is. Target moisture content depends on where the table will live.
Take measurements at multiple points:
- Center of the slab
- Near the edges
- At different depths if possible
Air drying works too, but it takes longer and requires perfect conditions. If you choose air drying, stack slabs with spacers between them.
Stage 3: Acclimation Before Assembly
After drying, the slab needs time to adjust to the humidity of the room where the table will live. This is called acclimation.
Leave the slab in the room for at least 2-4 weeks before assembly. This allows the wood to reach equilibrium with the air around it.
Temperature matters too. Avoid moving a slab from a cold environment to a hot one or vice versa.
Proper Live Edge Slab Drying Techniques
The drying process is where most of the work happens. Get this right, and the rest becomes much easier.
Measuring and Targeting Moisture Content
A moisture meter is not optional, it's essential. A basic pin-type moisture meter costs $20-50 and gives you readings in seconds. More advanced meters measure deeper into the wood.
Take readings at multiple locations on the slab:
- Three points across the width
- Three points along the length
- If possible, at different depths
The goal is to see if moisture is distributed evenly.
Target moisture content for a finished table in a typical home is 8-12%. If your home is very dry (heated in winter), aim for 8-10%.
Storage and Airflow Best Practices
How you store a slab during drying matters as much as how you dry it.
Stack slabs horizontally with spacers between them. Use wooden stickers (thin strips of wood) to create gaps.
Store in a location that's:
- Protected from direct sunlight
- Sheltered from rain and snow
- Well-ventilated
- Stable in temperature
Avoid basements (too humid) and attics (too hot). A garage or workshop works well if it's dry.
Flip slabs periodically if air drying. This encourages even drying. Flip every 2-4 weeks during the first few months.
Sealing Slab Ends to Slow Moisture Loss
End grain is the wood's highway for moisture movement. Sealing the ends is one of the highest-impact steps you can take.
Apply end sealant within hours of cutting. The slab loses moisture fastest in the first few days.
Common options:
| Sealant Type | Application | Effectiveness | Cost |
|---|---|---|---|
| Hot wax | Brush or dip | High | Low |
| Polyurethane | Brush, 2-3 coats | High | Low |
| Specialized slab sealer | Brush or spray | Very high | Medium |
| Tyvek tape | Tape over ends | Moderate | Low |
Reapply sealant if it cracks or peels during drying. The goal is continuous protection until the slab reaches target moisture content.
Some woodworkers seal the underside of the slab as well.
Managing Live Edge Table Humidity in Your Home
Once the table is built and in your home, humidity becomes the main threat. Wood continues to move with seasonal changes in humidity. A table that's stable in winter may swell in summer. A table stable in summer may shrink in winter.
Seasonal Changes and Wood Movement
Wood expands when it absorbs moisture and shrinks when it loses moisture. In winter, heated air is dry. The wood loses moisture and shrinks. In summer, air conditioning may create very dry conditions, or humidity may increase if you live in a humid climate.
Riverwood Live-Edge Parota & Resin Dining Table →
This seasonal movement is normal. The wood isn't failing, it's responding to its environment. The trick is to build the table in a way that allows this movement without creating visible cracks.
Heating, Air Conditioning, and Stable Conditions
Extreme swings in humidity are worse than consistently high or low humidity. A home that stays at 45-55% humidity year-round is ideal. Most homes fluctuate more than this.
Strategies to stabilize humidity:
- Use a humidifier in winter if the air gets below 30% humidity
- Use a dehumidifier in summer if humidity exceeds 65%
- Avoid placing the table near heat sources or air vents
- Keep the table away from windows where temperature swings are greatest
The table will still move slightly with the seasons. This is expected and not a sign of failure.
Best Finish for Live Edge Tables to Resist Cracking
The finish protects the wood and slows moisture movement. It doesn't prevent all movement, but it reduces it.
Finishes that work well:
- Water-based polyurethane (clear, durable, fast-drying)
- Oil-based polyurethane (deeper color, slower drying)
- Conversion varnish (professional-grade, very durable)
- Epoxy (for tables with resin accents)
Apply finish after the slab has acclimated to the room. A good finish has multiple coats. Sand lightly between coats for adhesion.
Avoid finishes that are too thick or too rigid. These can crack if the wood moves underneath. A finish should flex slightly with the wood.
Live Edge Slab Cracks Repair and Stabilization
Not every crack is a disaster. Some cracks are cosmetic. Others need repair. Understanding the difference saves time and money.
Distinguishing Active Cracks from Stable Checks
A check is a surface crack that forms during drying. It's usually shallow and runs along the grain.
An active crack is one that continues to grow. It may be deeper, run across the grain, or appear after the wood has dried. Active cracks signal ongoing stress.
To tell the difference:
- Mark the crack with a pencil at both ends
- Wait 2-4 weeks
- If the mark hasn't moved, the crack is stable
- If the crack has grown past the mark, it's still active
Stable checks can be left alone or filled for appearance. Active cracks need investigation. They usually mean the wood is still losing or gaining moisture unevenly.
Epoxy Resin Filling for Visible Cracks
Epoxy resin fills cracks and creates a smooth, finished surface. It's popular for live-edge tables because it's visible and adds visual interest.
Steps to fill with epoxy:
- Clean the crack with compressed air to remove dust
- Apply a thin coat of epoxy along the crack
- Pour epoxy into the crack, slightly overfilled
- Let epoxy cure per manufacturer instructions (usually 24 hours)
- Sand flush with the wood surface
- Apply finish over the epoxy
Epoxy comes in clear or tinted versions. Black epoxy is popular for live-edge tables. Colored epoxy matches the wood or creates contrast.
The epoxy won't prevent future cracks. It fills existing ones and makes them part of the design.
Mechanical Stabilization with Butterfly Keys
Butterfly keys (also called bow ties or dutchman patches) are wooden pieces inlaid across a crack. They add strength and visual character.
Butterfly keys work best for cracks that run across the grain or are likely to spread. They're less common for checks along the grain.
Installing a butterfly key requires:
- Routing a shallow recess along the crack
- Cutting a wooden piece to fit the recess
- Gluing the piece in place
- Sanding flush after the glue dries
Butterfly keys are decorative and functional. They're a design choice as much as a repair.
Building Your Table to Allow Natural Wood Movement
The final step is designing and building the table in a way that lets the wood move without creating visible problems.
Live-edge table bases should allow the top to expand and contract seasonally. This means:
- Use figure-eight fasteners or slot screws that allow slight movement
- Don't glue the top to the base
- Avoid rigid aprons that restrict movement
- Space fasteners along the grain direction, not across it
If the table has multiple slabs glued together, use flexible glues (like polyurethane glue) instead of rigid ones.
The underside of the table is just as important as the top.
At Mt. Our Riverwood Live-Edge Parota & Resin Dining Table and Raramuri Live-Edge Copper-Epoxy Dining Table are built to handle seasonal humidity changes. Each table is dried and prepared to prevent live edge table cracking before it reaches your home.


Protecting a live-edge table from cracking starts the moment the wood is cut and continues for the life of the table.
Frequently Asked Questions
What is the best finish for a live edge table?
The best finish for live edge tables combines protection with flexibility. Polyurethane and water-based finishes offer durability, but they can trap moisture if applied too thickly. Many craftspeople prefer a penetrating oil finish that allows the wood to breathe and adjust to humidity changes without restricting natural wood movement. For maximum crack resistance, apply finish only after the slab has fully acclimated to your home's humidity level, typically 6-12 months post-installation.
How do you tell if a live edge slab is properly dried?
Use a moisture meter to check the wood's moisture content. Target 8-12% for most interior spaces. Take readings at multiple points across the slab, including the center and near the edges. Wood species and thickness affect drying time; thicker slabs and dense species like mesquite require longer acclimation. If readings vary by more than 3-4% across the slab, continue drying. Proper kiln-dried wood from reputable sources should arrive close to target moisture levels.
Why do live edge tables crack?
Live-edge slabs crack because wood loses moisture unevenly. The exposed end grain dries much faster than the interior, creating internal stress that causes splits and checks. Once installed in a home, seasonal humidity swings and temperature changes force the wood to expand and contract, opening existing checks or creating new cracks. Unsealed ends and rapid drying accelerate this process. Proper sealing, gradual drying, and stable indoor humidity prevent most cracking.
What should you do if a crack appears in a live edge table?
First, determine if the crack is active or stable. Active cracks continue to expand; stable checks remain unchanged. For stable cracks, epoxy resin filling creates a clean repair that matches the wood's character. For active cracks, use mechanical stabilization like butterfly keys or bow ties to prevent further spreading. After filling or stabilizing, apply a finish that matches the rest of the table. Monitor the crack over the next year; if it widens, address humidity control in your home.